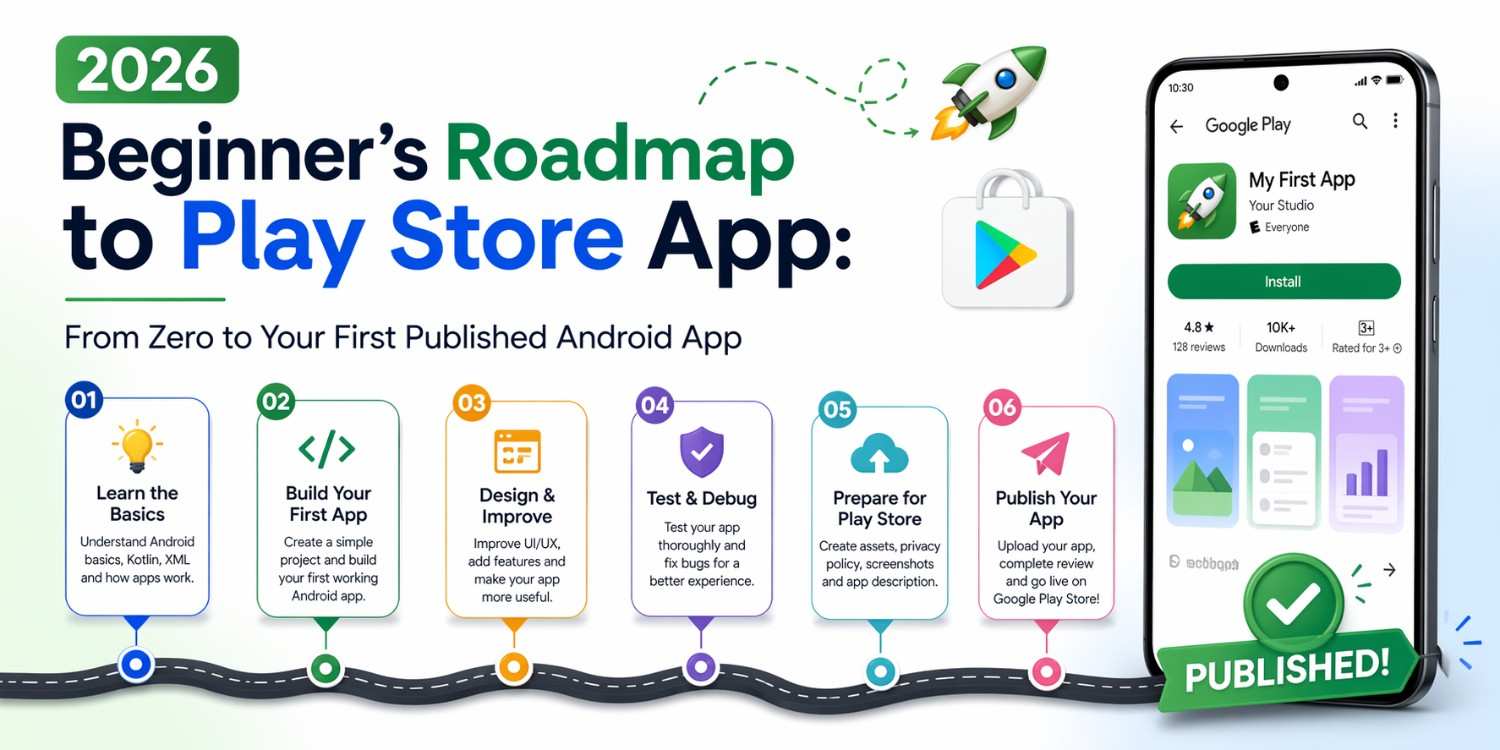
Most people who want to build an Android app don’t fail because the content is too hard. They fail because nobody gave them a clear sequence. They jump between YouTube videos, half-finish tutorials, and end up confused about what to learn next.
This Beginner’s Roadmap to Play Store App fixes that. It gives you a logical, stage-by-stage path — from knowing absolutely nothing about Android development to having a real app live on the Google Play Store. Every stage builds on the previous one. Nothing is skipped, nothing is padded.
If you follow this roadmap seriously in 2026, publishing your first app is genuinely achievable. Let’s get into it.
Why Most Beginners Get Stuck Before They Even Start
Before getting into the actual Beginner’s Roadmap to Play Store App stages, it’s worth understanding the most common reason people quit early.
They try to learn everything at once.
Android development in 2026 involves Kotlin, Jetpack Compose, Android architecture, databases, APIs, testing, and publishing. If you treat all of that as one giant subject that needs to be mastered before you write a single screen — you’ll never start. Or you’ll start, get overwhelmed in week two, and stop.
The roadmap approach works differently. You learn what you need for each stage, complete that stage, then move forward. You don’t need to understand Room database on day one. You don’t need to know how to publish an app before you’ve built one.
One stage at a time. That’s the whole philosophy behind this Beginner’s Roadmap to Play Store App.
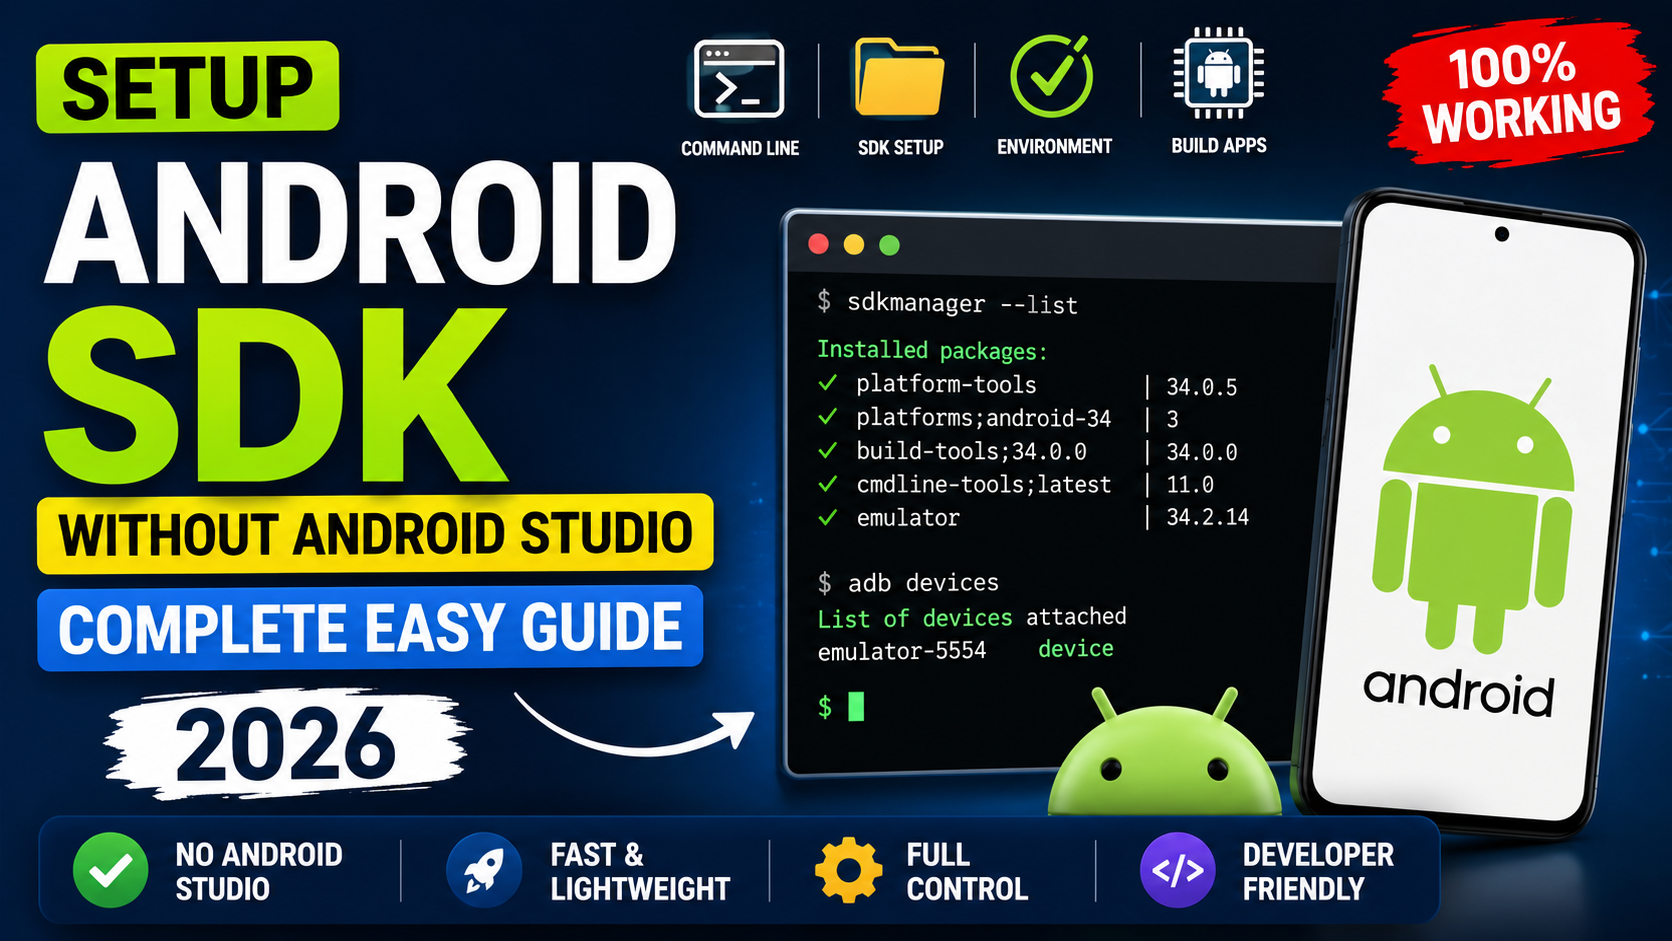
Stage 1: Set Up Your Environment and Confirm It Works
Install Android Studio Properly
Download Android Studio from developer.android.com/studio. It’s free, maintained by Google, and is the only tool you need to write, test, and build Android apps.
During installation, don’t uncheck anything. The SDK, emulator components, and platform tools are all required. First-time setup downloads a few gigabytes of files — let it finish completely before touching anything else.Beginner’s Roadmap to Play Store App
Create a Test Project and Run It
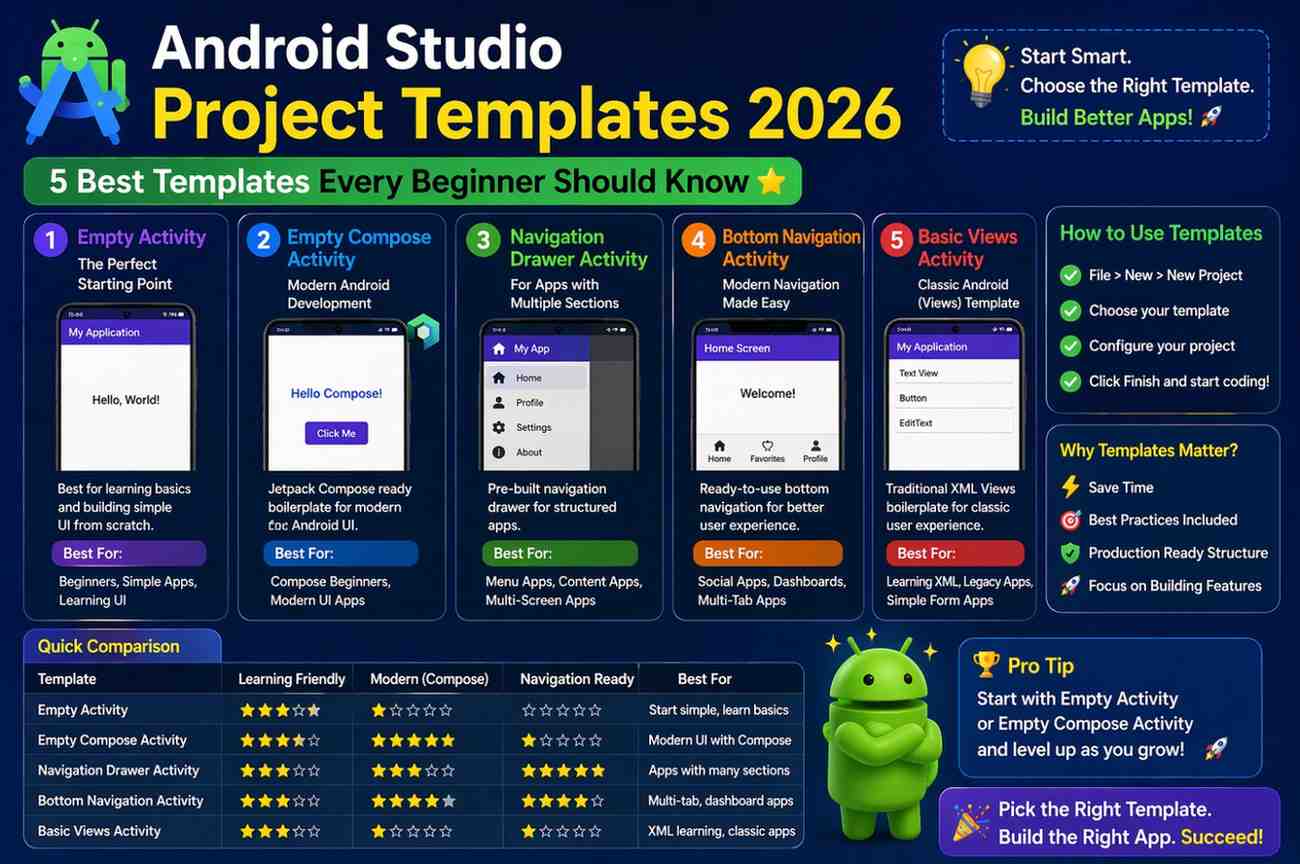
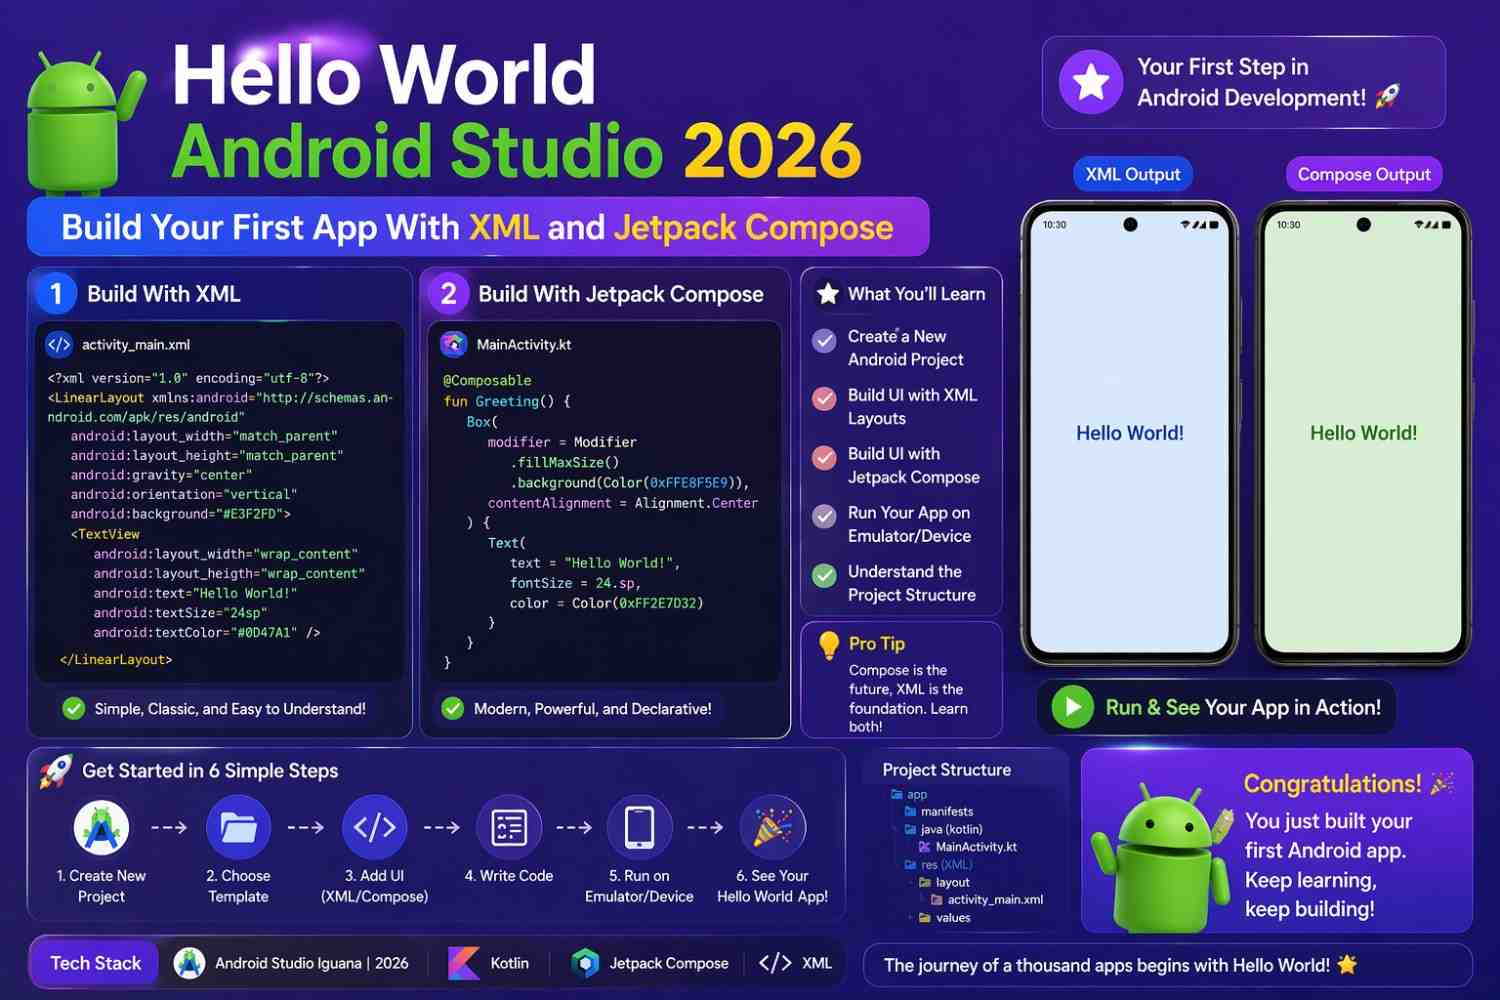
Once installed, create a new project using the Empty Activity template. Select Kotlin as the language. Let Gradle sync finish. Then open Tools → Device Manager, create a Pixel 8 emulator using the latest API level, and press Run.
If “Hello Android!” appears on the emulator — congratulations, your environment works. This verification step matters. A broken setup causes mysterious errors for weeks if you don’t catch it on day one.
Stage 2: Learn Kotlin Fundamentals (Weeks 1–2)
This stage of the Beginner’s Roadmap to Play Store App is the one most people rush — and then regret.
Kotlin is the programming language behind every Android app you’ll build. Skipping it means you’ll copy code without understanding it. That works until something breaks, and then you’re completely stuck.
What to Actually Learn in Kotlin
Variables and data types — val for fixed values, var for values that change. Understanding when to use each one prevents dozens of future bugs.
Functions — How to write reusable blocks of logic. Most Android development is writing functions and calling them in response to user actions.
Conditionals and loops — if/else, when, for loops. Apps constantly make decisions and repeat actions based on conditions.
Classes and objects — Kotlin is object-oriented. Understanding how to create a class and use its properties and functions is foundational for ViewModel and data modeling.
Null safety — Kotlin’s ? and !! operators exist to prevent the app from crashing when a value is unexpectedly empty. This concept is unique to Kotlin and genuinely important.
Don’t use an Android project to practice these. Use Kotlin Playground — a browser-based environment where you can write and run Kotlin without any setup. Practice each concept until it feels natural, not just familiar.
Two focused weeks here saves you months of confusion later.
Stage 3: Learn Jetpack Compose Basics (Weeks 3–4)
Jetpack Compose is how you build the visual parts of your app. In 2026 it’s the standard — not an alternative, not an experiment. Every new Android project uses it by default.
Composable Functions
Everything visible in a Compose app is a function annotated with @Composable. That annotation is what tells the system: this function produces UI, not just logic.
kotlin
@Composable
fun ProfileCard(name: String, role: String) {
    Column(modifier = Modifier.padding(16.dp)) {
        Text(text = name, style = MaterialTheme.typography.titleMedium)
        Text(text = role, style = MaterialTheme.typography.bodySmall)
    }
}
Column stacks children vertically. Text shows text. Modifier controls spacing, size, and appearance. These three things alone let you build most basic screens.
State Management in Compose
State is the most important concept in this entire roadmap. Your UI in Compose doesn’t update automatically when a plain variable changes. It only updates when observed state changes.
kotlin
@Composable
fun LikeButton() {
    var liked by remember { mutableStateOf(false) }

    Button(onClick = { liked = !liked }) {
        Text(if (liked) "Liked ✓" else "Like")
    }
}
remember { mutableStateOf(false) } creates state that Compose watches. When liked changes, the Button text updates automatically. Without this, tapping the button does nothing visible.
Build small interactive components to practice this. A counter. A toggle. A simple form. Repetition here pays off enormously in every stage after this one.Beginner’s Roadmap to Play Store App
Stage 4: Build a Complete App With Navigation and Data (Weeks 5–7)
This is the heart of the Beginner’s Roadmap to Play Store App — the stage where you stop practicing isolated concepts and actually build something complete.
Choose a Simple, Completable Project
Pick one of these — a notes app, a habit tracker, a personal reading list, or a simple expense logger. All of them use the same core skills: a list screen, a detail or add screen, navigation between them, and local data storage.
Don’t invent something complicated. The goal at this stage is completing something, not impressing anyone.
Add Navigation Between Screens
Real apps have multiple screens. Navigation Compose handles moving between them.
kotlin
@Composable
fun AppNavigation() {
    val navController = rememberNavController()

    NavHost(navController = navController, startDestination = "list") {
        composable("list") {
            NoteListScreen(onAddClick = { navController.navigate("add") })
        }
        composable("add") {
            AddNoteScreen(onSaved = { navController.popBackStack() })
        }
    }
}
NavHost defines the navigation graph. composable("list") defines what screen appears at that route. navController.navigate("add") moves the user forward. popBackStack() takes them back.
Two screens connected by navigation — that’s a real app structure.
Store Data Permanently With Room
In-memory state disappears when the app closes. Room is Android’s official database library and makes data permanent without writing a single line of SQL manually.
At the high level: annotate your data class with @Entity, define your operations in a @Dao interface, and connect them in a @Database class. Room generates everything underneath.
kotlin
@Entity
data class Note(
    @PrimaryKey(autoGenerate = true) val id: Int = 0,
    val content: String,
    val timestamp: Long = System.currentTimeMillis()
)
Add Room to your project, connect it to your ViewModel, and replace in-memory state with database operations. Your data now survives app restarts.
The official Room documentation is genuinely beginner-friendly and worth reading alongside your implementation.
Use ViewModel for Clean Architecture
Your Composables should display state and forward user actions — nothing else. All logic belongs in a ViewModel.
kotlin
@HiltViewModel
class NoteViewModel @Inject constructor(
    private val repository: NoteRepository
) : ViewModel() {

    val notes: StateFlow<List<Note>> = repository.getAllNotes()
        .stateIn(viewModelScope, SharingStarted.Lazily, emptyList())

    fun addNote(content: String) {
        viewModelScope.launch {
            repository.insert(Note(content = content))
        }
    }
}
ViewModel survives screen rotation. It keeps your business logic separate from your UI. And it makes your code dramatically easier to debug when something breaks.
Stage 5: Test Your App Thoroughly
Before publishing anything, you need to test it properly. Not just “I ran it once and it worked.” Real testing.
Test on Multiple Screen Sizes
Your emulator probably uses a Pixel 8 screen. But real users have phones with small screens, tablets, and different aspect ratios. Android Studio’s Device Manager lets you create multiple emulators with different screen sizes. Run your app on at least two or three different configurations.
Check for text that gets cut off, buttons that overflow, or lists that don’t scroll when they should.
Test Edge Cases Deliberately
What happens when the user adds an empty note? What if they rotate the screen mid-input? What if they tap the add button five times quickly?
Go through every user action in your app and deliberately try to break it. You’ll find at least two or three issues that weren’t obvious during normal use. Fix them before publishing.
Write Basic Unit Tests
Unit tests verify that your logic works correctly in isolation. Your ViewModel’s addNote function should work the same way every time regardless of what’s on screen.
kotlin
@Test
fun `adding empty note should not insert to database`() {
    viewModel.addNote("")
    assertTrue(viewModel.notes.value.isEmpty())
}
You don’t need complete test coverage for your first app. But writing a few basic tests for your core logic teaches you habits that matter for every project after this one.
Stage 6: Prepare Your App for the Play Store
This stage of the Beginner’s Roadmap to Play Store App is where most beginners are surprised by how much is involved beyond the code itself.
Create a Release Build
Debug builds — the ones you’ve been running during development — aren’t suitable for publishing. You need a signed release APK or AAB (Android App Bundle).
In Android Studio, go to Build → Generate Signed Bundle/APK. Create a keystore file (keep this somewhere safe — losing it means you can never update your published app). Follow the steps to generate a release AAB file.
Prepare Your Store Listing
Go to play.google.com/console and create a developer account. There’s a one-time $25 registration fee.
Your store listing needs a short description (80 characters), a full description (up to 4000 characters), at least two screenshots from your app, and a 512×512 pixel icon.
Write your descriptions honestly — what the app does, who it’s for, what makes it useful. Screenshots should show the actual app in use, not blank screens.
Set Up Content Rating and App Category
The Play Console walks you through a content rating questionnaire. Answer honestly. Choose the most accurate app category. These settings affect who can find your app in search results.
Stage 7: Publish and Iterate
Submit for Review
Upload your AAB file, complete all required fields in the Play Console, and submit for review. Google’s review process in 2026 typically takes a few hours to a few days for new apps.
You’ll receive an email when the app is approved and live. That first notification — seeing your app publicly available on the Play Store — is genuinely one of the better moments in this whole process.
Update Based on Real Feedback
Once live, real users will find things you didn’t test. Crashes you didn’t anticipate. UI that confused people you didn’t expect it to confuse.
The Play Console shows crash reports and user reviews. Read them. Fix real issues. Push updates. This iteration cycle — build, publish, observe, improve — is what separates apps that stay live from apps that get forgotten.
This Beginner’s Roadmap to Play Store App doesn’t end at publishing. Publishing is just the beginning of the feedback loop.
Realistic Timeline for This Roadmap
Every learner moves at a different pace, but here’s an honest estimate for someone putting in consistent effort — roughly one to two focused hours per day.
Stage 1 and 2 together take about two weeks. Stage 3 takes another two weeks. Stage 4 is the longest — building a complete app with navigation and Room takes three to four weeks for most beginners. Stage 5 through 7 together add another two to three weeks.
Total: roughly ten to twelve weeks of consistent, focused effort to go from zero to a published Play Store app following this Beginner’s Roadmap to Play Store App.
That’s not a guarantee. Some people move faster. Some need more time on specific stages. But it’s a realistic, honest estimate — not the “build an app in a weekend” claim that sets beginners up for disappointment.
Final Conclusion
This Beginner’s Roadmap to Play Store App exists because the biggest obstacle for most beginners isn’t ability – it’s sequence. Knowing what to learn, in what order, and why each stage matters makes the difference between finishing and quitting.
Set up your environment. Learn Kotlin fundamentals properly. Understand Compose and state. Build one complete, modest app. Test it honestly. Prepare your store listing carefully. Publish it. Then improve it based on what you learn from real users.
Every Android developer with an app on the Play Store started exactly where you are right now. The path from here to there is clear – follow it one stage at a time, and you’ll get there.