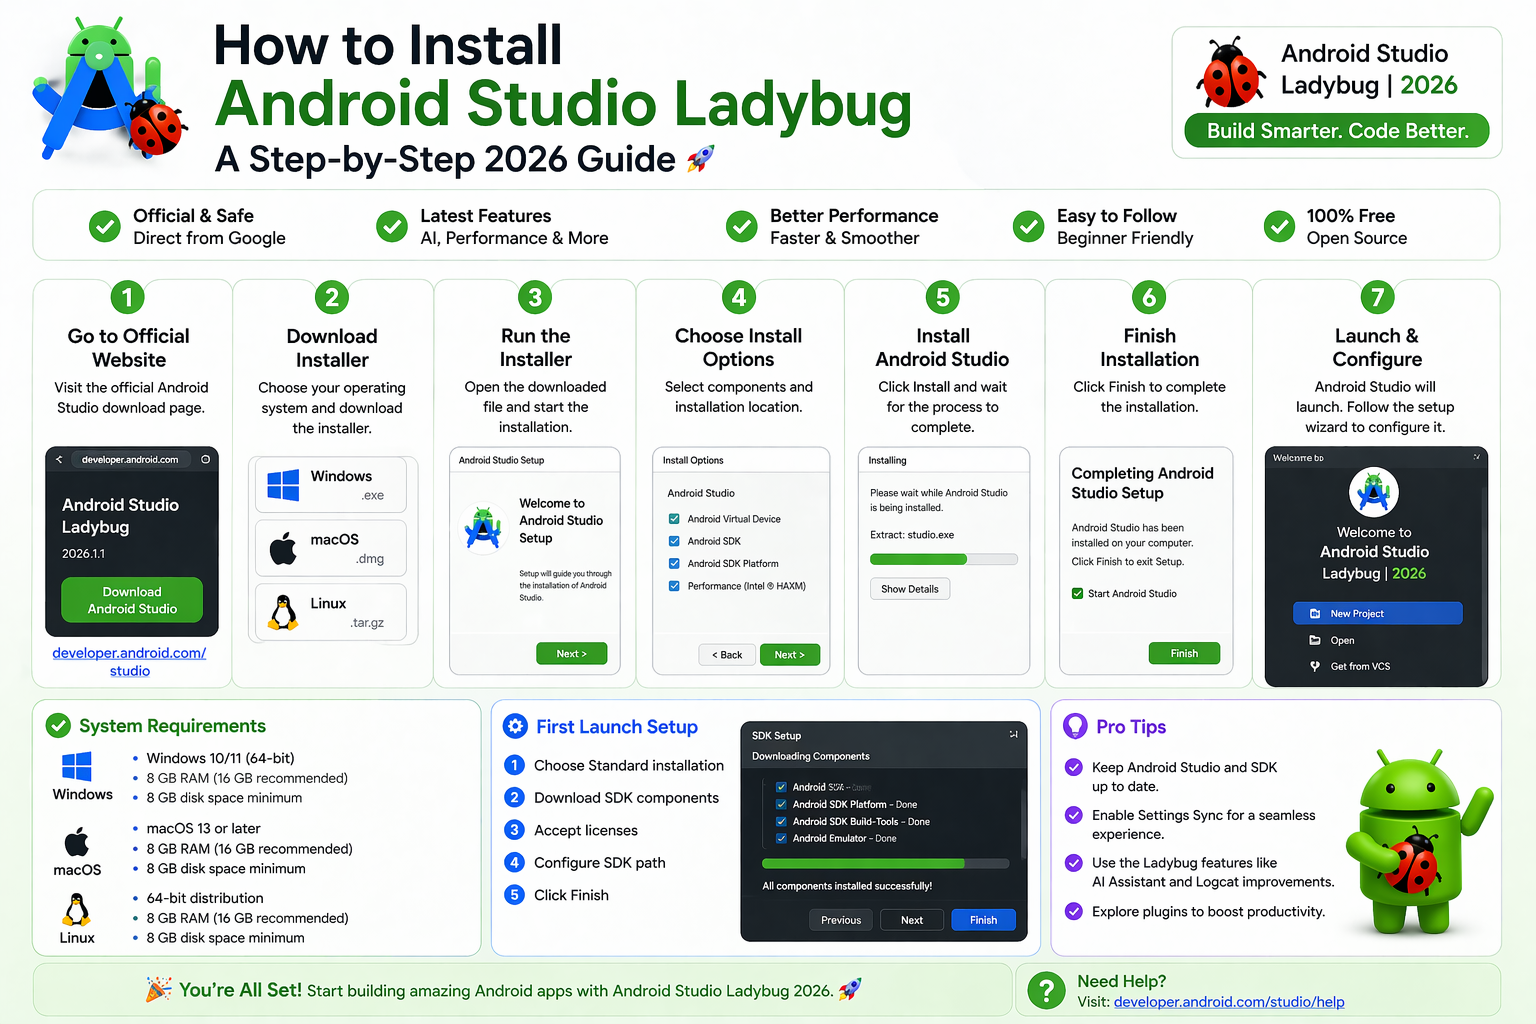
A lot of beginners assume that to install Android Studio Ladybug is just a matter of clicking download and running an installer. And in a perfect world, that would be the whole story. But there are enough version choices, SDK configuration steps, and first-time setup decisions along the way that it’s genuinely easy to end up with a broken or incomplete environment — without any obvious sign that something went wrong.
This guide walks through the entire process clearly and in the right order. Whether you’re on Windows, Mac, or Linux, by the time you reach the end you’ll have a fully working setup ready for your first Android project.
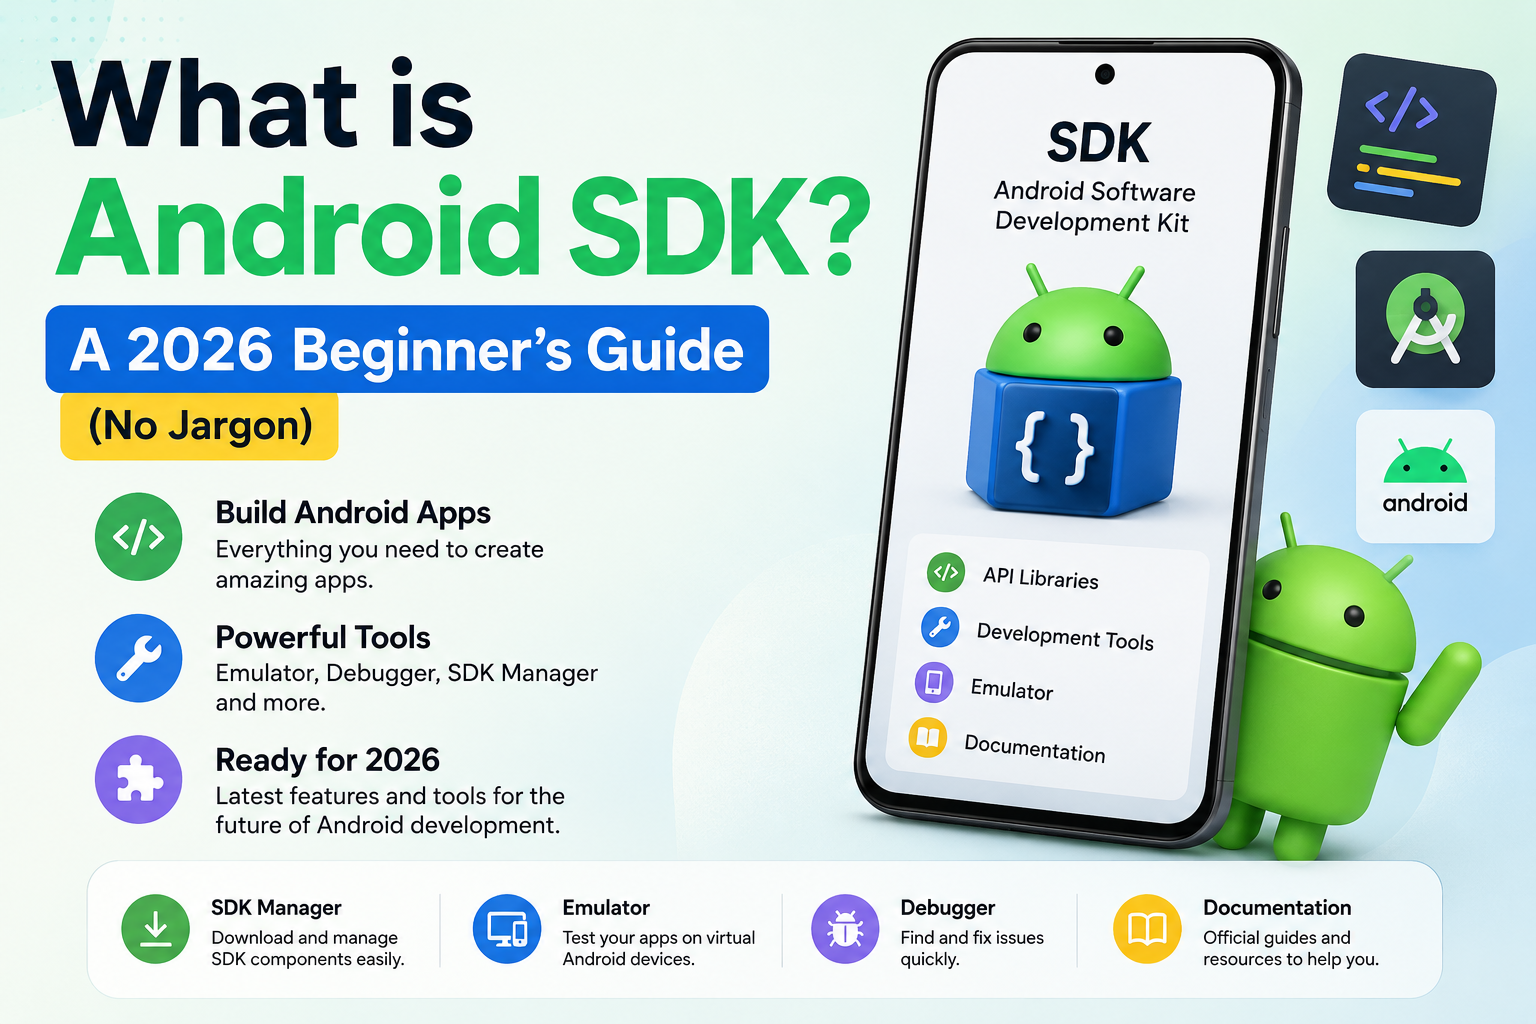
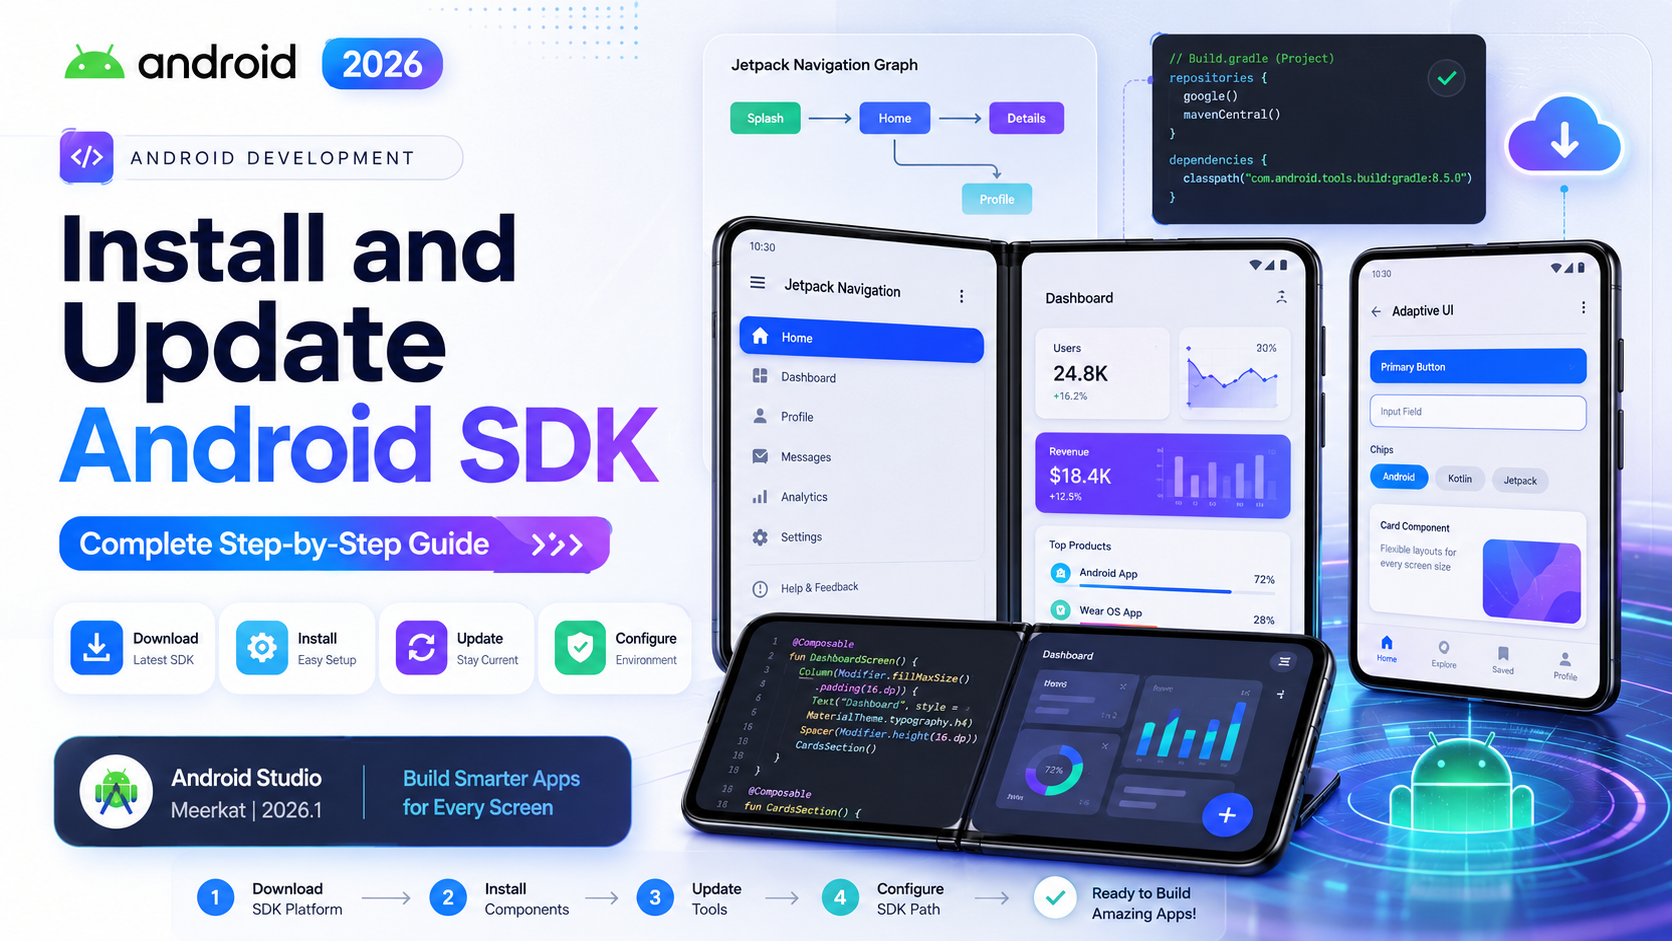
What Is Android Studio Ladybug?
Android Studio releases are named after insects in alphabetical order — Iguana, Jellyfish, Koala, Ladybug. Ladybug is the current stable release for 2026.
It ships with the updated New UI enabled by default, full Gemini AI integration built into the editor, improved Jetpack Compose tooling, and support for the latest Android SDK versions. It’s the version you should be using if you’re starting Android development today.
One important point before anything else: always download from the official source at developer.android.com/studio. There are unofficial mirrors and repackaged versions floating around online. Stick to the official site — it always has the current stable release and nothing extra added.
Before You Download: Check System Requirements
Taking two minutes to verify your system specs before downloading saves a lot of frustration. To install Android Studio Ladybug and use it comfortably, you’ll need:
- RAM: 8 GB minimum, 16 GB recommended
- Storage: At least 15 GB of free space — the installer is around 1 GB, but the SDK and emulator images add considerably more
- OS: Windows 8/10/11 (64-bit), macOS 10.14 or later, or 64-bit Linux
If your machine is close to the minimum — particularly on RAM — Android Studio will technically run, but it will feel slow. A 16 GB machine gives a noticeably smoother experience, especially when the emulator is running alongside the IDE.
How to Install Android Studio Ladybug on Windows
Step-by-Step Windows Installation
Download the .exe installer from the official site. The file is roughly 1 GB, so give it a few minutes depending on your connection speed.
Run the downloaded file. Windows may show a security dialog — click Yes or Run Anyway to proceed. This is completely expected behavior for software downloaded from outside the Microsoft Store.
The installer walks you through a small number of choices:
Installation Components: Keep the default selection. This includes Android Studio itself and the Android Virtual Device — the emulator. Don’t uncheck either of these.
Installation Location: The default path (C:\Program Files\Android\Android Studio) is fine for most people. Change it only if you have a specific reason.
Start Menu Folder: Leave this as the default and click Install.
The installation process takes roughly 5–10 minutes. When it finishes, leave Start Android Studio checked and click Finish. Android Studio will open automatically and launch the first-time Setup Wizard.
How to Install Android Studio Ladybug on macOS
Apple Silicon vs Intel — Get This Right First
Download the .dmg file from the official site. Before clicking download, check which chip your Mac uses. Go to Apple Menu → About This Mac.
If you see Apple M1, M2, M3, or M4 — download the Mac (Apple Silicon) version. If you see Intel — download the Mac (Intel) version. Using the wrong build for your chip causes real performance problems, so this step matters.
Open the downloaded .dmg file. A window appears showing the Android Studio icon next to an Applications folder shortcut. Drag Android Studio into Applications. That’s the standard Mac installation process — nothing unusual here.
Close the disk image and open Android Studio from your Applications folder, or use Spotlight (Cmd + Space, type “Android Studio”).
On first launch, macOS will show a security prompt: “Android Studio was downloaded from the internet. Are you sure you want to open it?” Click Open. This is expected for any app downloaded outside the Mac App Store.
How to Install Android Studio Ladybug on Linux
Extracting and Launching on Linux
Download the .tar.gz archive from the official site. Extract it to your preferred location — /opt/android-studio is a common and clean choice:
bash
sudo tar -xzf android-studio-*.tar.gz -C /optNavigate to the extracted directory and run the launch script:
bash
cd /opt/android-studio/bin
./studio.sh
During first-time setup, Android Studio will offer to create a desktop entry automatically — click Configure → Create Desktop Entry so you can launch it easily going forward.
Linux users should also ensure Java is available on the system. Android Studio bundles its own JDK, but having a system JDK prevents some compatibility issues down the line:
bash
sudo apt install default-jdk        # Ubuntu/Debian
sudo dnf install java-17-openjdk   # Fedora
First-Time Setup: The Setup Wizard
Don’t Rush Through This Part
When you install Android Studio Ladybug and launch it for the first time, the Setup Wizard runs automatically. This is where your development environment actually gets configured. Rushing through it is the most common reason people end up with a broken setup.
UI Theme: Choose Dark or Light — this is purely personal preference and can be changed anytime later in Settings.
SDK Components Setup: This screen is the important one. You’ll see three items listed:
- Android SDK — Essential. Keep this checked.
- Android SDK Platform — The latest stable platform version (API 35 for 2026). Keep this checked.
- Android Virtual Device — The emulator. Keep this checked unless you’re certain you’ll only ever use a physical device for testing.
The total download size is typically 3–5 GB. How long this takes depends entirely on your internet connection speed.
Read through the license agreements, accept them, and click Finish. The SDK download begins. Don’t close Android Studio while this is running.
What Gets Installed and Where
Understanding where things land on your disk is useful for troubleshooting later. When you install Android Studio Ladybug, files go to these locations:
Android Studio application:
- Windows:
C:\Program Files\Android\Android Studio - Mac:
/Applications/Android Studio - Linux: Wherever you extracted it
Android SDK:
- Windows:
C:\Users\YourName\AppData\Local\Android\Sdk - Mac:
~/Library/Android/sdk - Linux:
~/Android/Sdk
Emulator images are stored inside the SDK directory under system-images/.
If you ever need to change the SDK location, go to File → Project Structure → SDK Location inside Android Studio.
Verifying Your Installation Works
Run a Test Project Before You Start Building
Once the SDK download finishes, verify everything is working before starting your first real project. Click New Project, select Empty Activity, leave all the details as their defaults, and click Finish.
Wait for the initial Gradle sync to complete. The first sync takes a few minutes because it downloads the project’s dependencies. This is normal.
Once sync finishes, set up an emulator: Tools → Device Manager → Create Device. Select Pixel 6a or any recent phone model, choose API 34 or 35, download the system image if prompted, and click Finish.
Launch the emulator from Device Manager, then press the green Play button in Android Studio. If you see “Hello Android!” on the emulator screen, your setup is complete and working correctly. You’re ready to build.
Common Installation Problems and How to Fix Them
Gradle Sync Fails on First Project
This is almost always a network issue. Make sure your internet connection is stable and try syncing again. If you’re on a corporate or university network, a firewall may be blocking Gradle’s access to its download repositories. Testing on a mobile hotspot quickly confirms whether network is the culprit.
Emulator Won’t Start — HAXM Error on Windows
This means hardware virtualization isn’t enabled in your BIOS. Restart your computer, enter BIOS settings during startup, and enable Intel VT-x (for Intel CPUs) or AMD-V (for AMD CPUs). Save and restart. The emulator should work normally after this.
“Android SDK Not Found” Error
The SDK path in Android Studio’s settings doesn’t match where the SDK was actually installed. Go to File → Project Structure → SDK Location and point it to the correct directory. On Windows this is typically C:\Users\YourName\AppData\Local\Android\Sdk.
Slow Performance After Installation
Check that the emulator is using hardware acceleration. In Device Manager, the performance column for your emulator should show Hardware – GLES 2.0 rather than Software. If it shows Software, hardware virtualization either isn’t enabled or isn’t being detected correctly — revisit the BIOS virtualization setting.
For more detailed troubleshooting on emulator performance, the official Android emulator acceleration guide covers platform-specific steps for Windows, Mac, and Linux.
Final Conclusion
To install Android Studio Ladybug correctly in 2026 isn’t complicated — but it does require paying attention at the right steps. Download from the official source, select the right build for your platform, work through the Setup Wizard carefully, let the SDK download finish completely, and verify with a test project before starting anything real.
The whole process takes 30–60 minutes depending on your internet speed and hardware. After that, you have a fully working Android development environment — Jetpack Compose, Kotlin, emulator testing, Gemini AI assistance, and everything else modern Android development involves. Getting the setup right from the start means you can focus on actually learning to build apps instead of debugging your environment.